:max_bytes(150000):strip_icc()/003-using-layer-masks-gimp-to-edit-1701686-b55dcaa66cac4d4b9b01545b4e06c143.jpg)
Use Layer Masks in GIMP to Edit Specific Areas
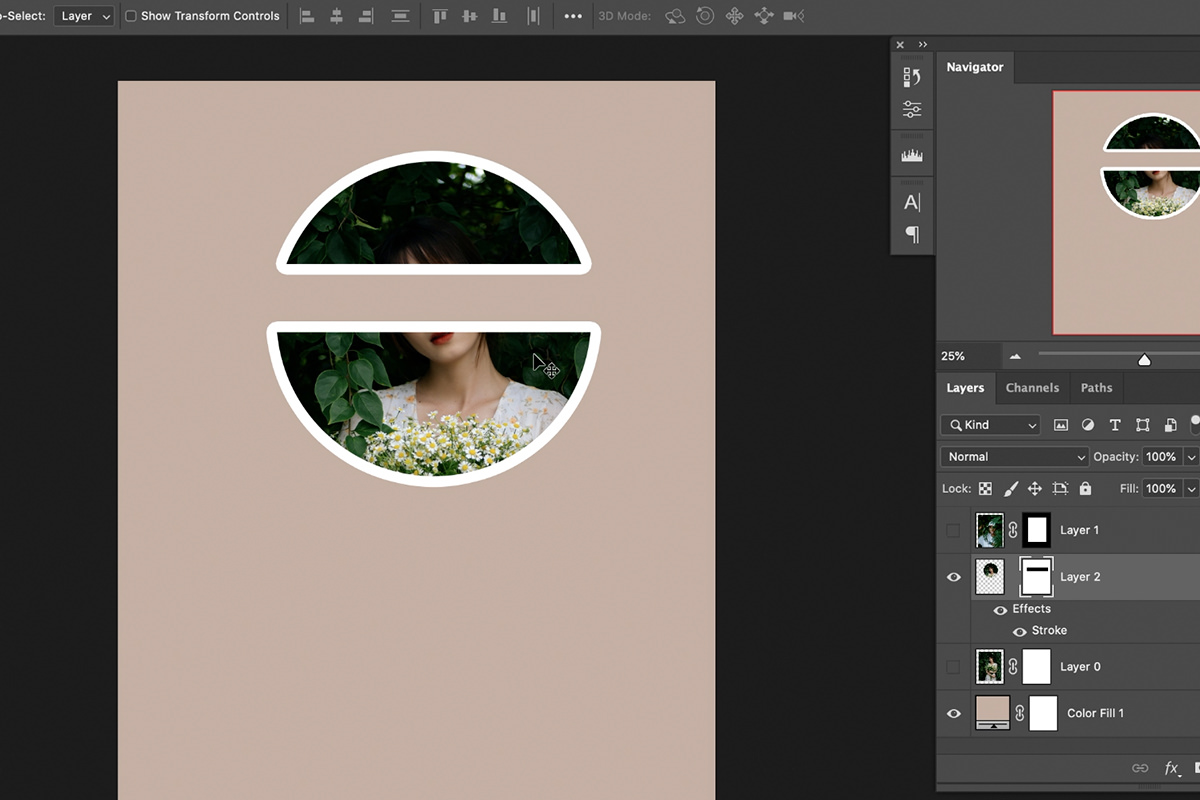
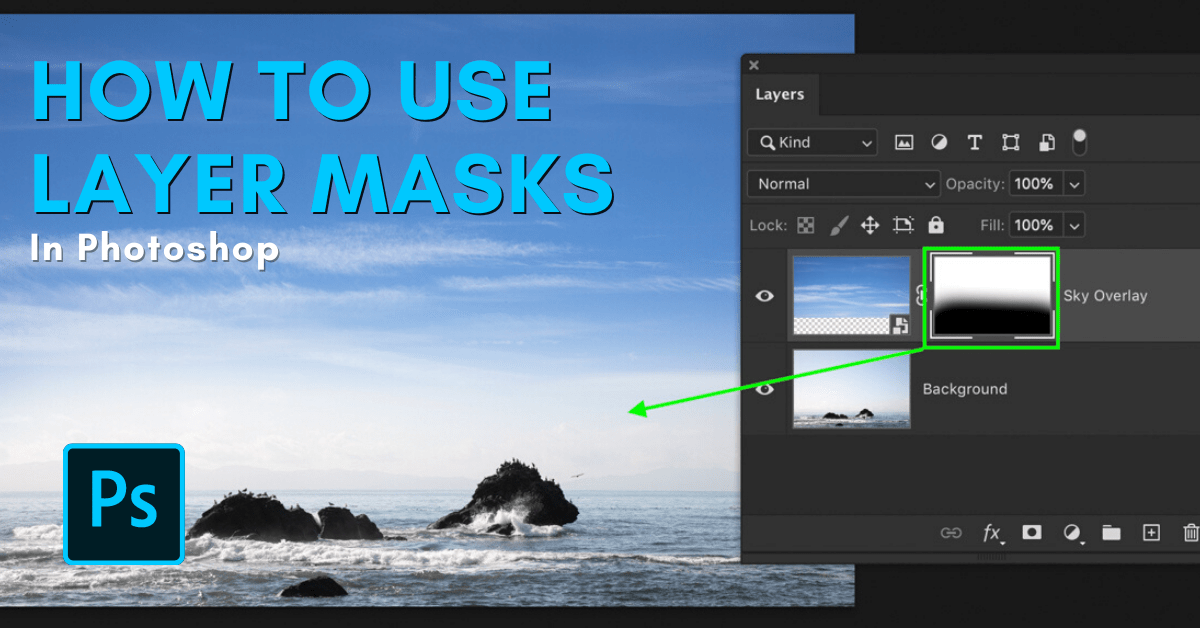
Photoshop layer masks overview. Layer masking is a non-destructive way to hide parts of an image or layer without erasing them. They're great for making image composites, modifying background colours, removing or cutting out objects and targeting your edits so they affect only certain areas, rather than the entire layer.

How to Use Layer Masks in and 7 Layer Masking tips photography
7. Invert Layer Masks. To switch between revealing and hiding, select the layer mask thumbnail and press "Ctrl+I" (Windows) or "Cmd+I" (Mac) to invert the mask. 8. Refine Edges. Use the Brush tool with a soft edge to refine mask transitions for smoother blending. Lower the brush opacity for subtle adjustments. 9.
10 Tips for Using Layer Masks in PHLEARN
[CC] Adobe Photoshop has been around in some form for over 30 years and it's still the most widely used programme for editing photographic files. Whether you.

How to Use Layer Masks in and 7 Layer Masking tips Layer mask
Click on the "add layer" button in the layers panel to create a new layer to work on. The keyboard shortcut for adding new layers is Shift+Ctrl+N. Add the image you want to alter. 2. Add your layer mask. In the layers panel, click on the layer you want to add a mask to, then click the layer mask button at the bottom of the layers panel.
How to Use Layer Masks in Design Bundles
Step 2 - Add a Layer Mask. When you have chosen the layer in the layers panel to which you wish to add a layer mask, navigate to the top menu bar and select Layer. In the drop-down menu, scroll down and select Layer Mask > Reveal All. Alternatively, create a layer mask by clicking the Layer Mask Button in the Layer Panel.

How to Use Layer Masks in and 7 Layer Masking tips Layer mask
In short, a layer mask is used to hide parts of a layer, without permanently erasing its information. The advantage of this is a reversible means to cut out images, alter layers, or blend images together. A layer mask gives you far more flexibility when adjusting a layer.
How to Use Layer Masks in and 7 Layer Masking tips
Layer masking is a nondestructive way to hide parts of an image or layer without erasing them. They're great for making image composites, modifying background colors, removing or cutting out objects, and targeting your edits so they affect only certain areas, rather than the entire layer. Feather, adjust, repeat.
Layer Masks For Beginners Tutorial YouTube
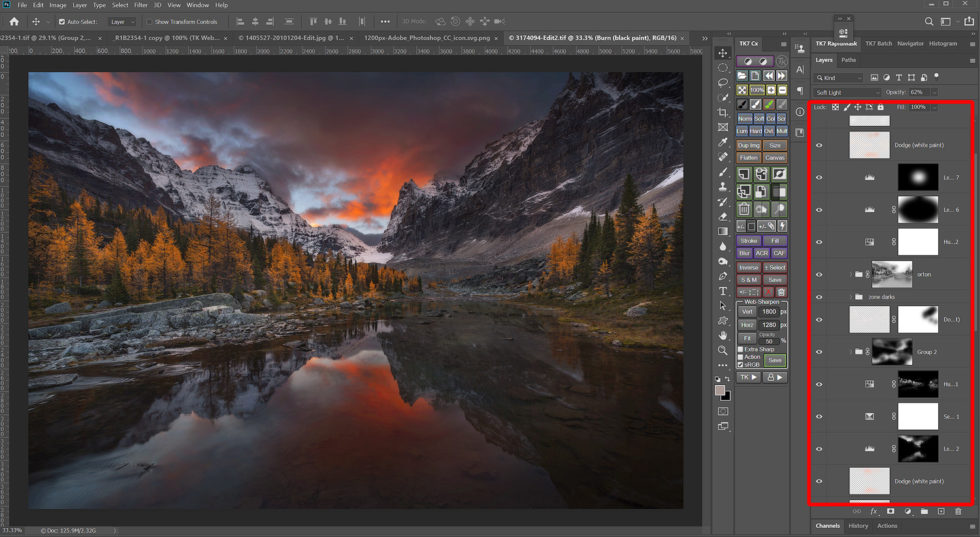
Manual Masking Quick Tips: Option + Click (use Alt + Click on PC) on your layer mask thumbnail to see your mask in the main document window. Shift + Option + Click (use Shift + Alt + Click on PC) on your layer mask to see your mask in a 50% transparent red overlay, or use the \ key.
How To Use Layer Masks In (With Shortcuts!)
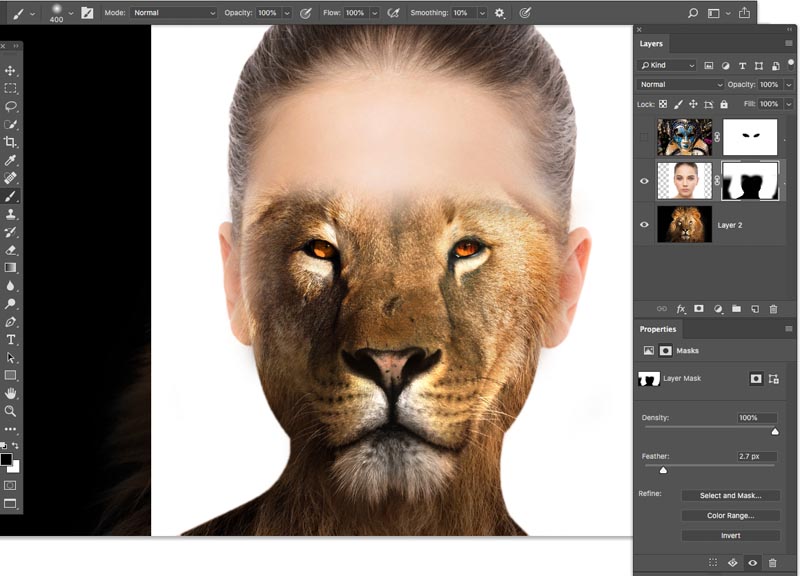
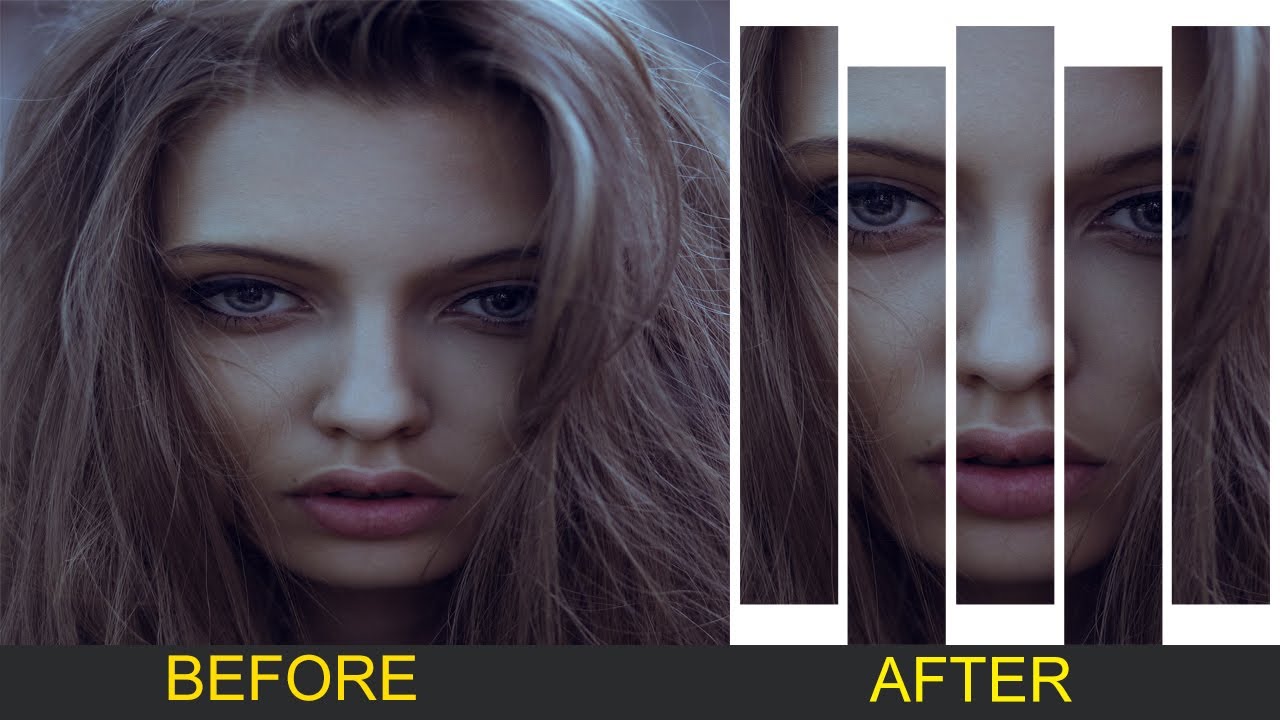
It's because of how layer masks work in Photoshop. Layer masks use only white, black, and all the shades of gray in between, and they use these three colors (white, black and gray) to control the transparency of a layer. White in a layer mask means 100% visible. Black in a layer mask means 100% transparent. And gray in a layer mask means some.

How to Use Layer Masks in and 7 Layer Masking tips Layer mask
Layer masks are a key feature of Photoshop that allow you to nondestructively hide and show selective portions of your image.. Local Pixel Editing and Retouching 10. Local Pixel Editing and.

How to Use Layer Masks in Creatisimo
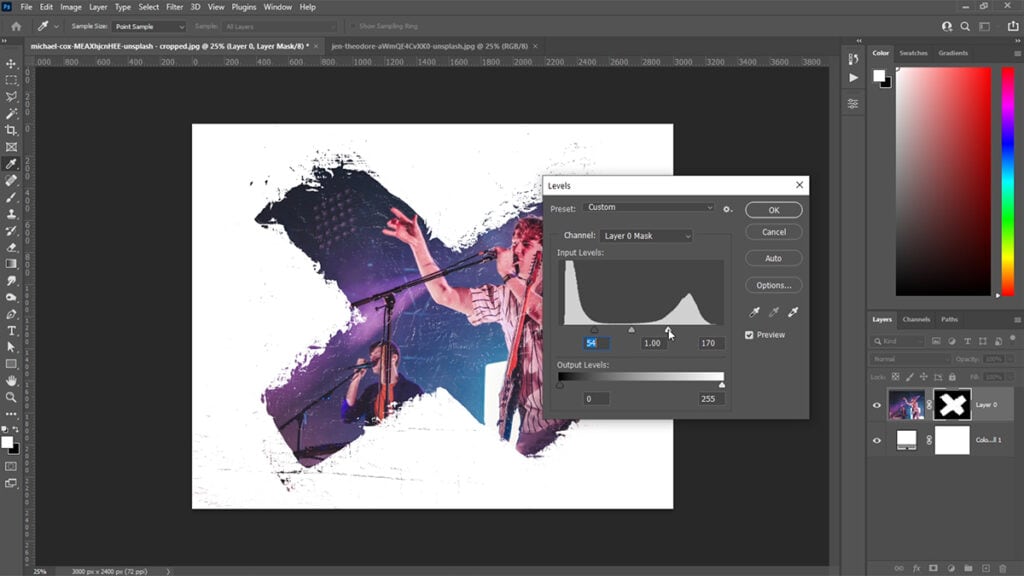
1 Answer Sorted by: 8 The thing to remember is that black conceals and white reveals. To edit the mask you will want select your mask and manipulate the white and black pixels in the mask. There are numerous techniques that allow you to manipulate a layer mask. A few of them: Using the brush tool to 'paint' on a mask
How to paste into a Layer Mask in StudioRat
The highlight border around the thumbnail tells us that the layer mask is selected. Then, to fill the layer mask with black, go up to the Edit menu at the top of the screen and choose Fill: Going to Edit > Fill. This opens Photoshop's Fill dialog box. Change the Contents option at the top to Black, then click OK:

PicsArt Portrait Brush Effects Tutorial Layer Mask Method Photo Editing YouTube
In the Layers panel, select the layer containing the vector mask you want to edit. Click the Vector Mask button in the Properties panel or the thumbnail in the Paths panel. Then change the shape using the shape, pen, or Direct Selection tools. Change vector mask opacity or feather mask edges
Layer Masks In Explained Photo Cascadia
Convert your Background layer into a regular layer by navigating to Layer > New > Layer from Background. Use the Add layer mask icon at the end of the Layers panel to add a Layer Mask . View the Layer mask and Vector mask thumbnails in the Layers panel Use the Density and Feather sliders to make adjustments to your composite.
Masking in How to Use Layer Masks YouTube
photo mask is a piece of glass that you will use to transfer your design to a material layer that you wish to pattern for further processing. The physical properties of each mask fabricated at the NanoFab are: 5" x 5" soda lime glass. 0.09" thick. Chrome coated (approx 70nm thick) Figure 1 - Non-Inverted Mask.
How to use layer masks for beginners YouTube
You can add a mask to a layer and use the mask to hide portions of the layer and reveal the layers below. To easily edit and refine existing layer masks, do the following: In the Layers panel, select the layer containing the mask you want to edit. Click the Mask thumbnail in the Layers panel. Select any of the editing or painting tools.
